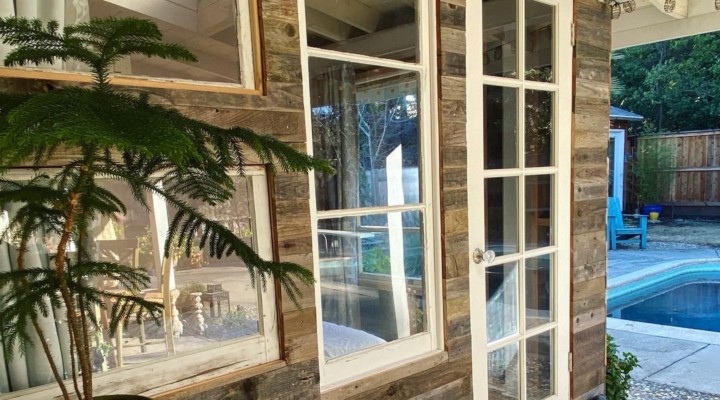
With our small-ish three-bedroom house and the pandemic bringing grown kids home for longer visits, we found we needed a little extra room. Santia wondered about buying a shed and converting it to sleeping space, like a “she-shed.” But sheds are surprisingly expensive! We like DIY-ing as much as possible (and saving money), and her next idea was fantastic — we decided to build something like a shed underneath the existing patio roof. Not needing to roof it made this a pretty easy project!
Pretty cool, right?
Homemade shiplap!
Her next idea was truly brilliant. We’d been holding on to some old cedar fence boards since we replaced the back fence a year before, thinking of maybe making an accent wall or something. She suggested using them for siding by turning them into homemade shiplap. BRILLIANT, I tell you! I have an old table saw and a dado/rabbet blade kid, and this was not hard to do. It took a while, but it wasn’t hard. The important thing was measuring carefully to make the depth of the rabbet as close to half the thickness of the board as possible, so each piece would fit just right over the previous one.
By the way, even as old as these boards were (maybe 30+ years, hard to tell), the cedar still gave out its beautiful scent when cutting the boards. This process created a lot of sawdust and curly wood chips, and I happily added to them to our compost. Good stuff!
Here’s how we did it
Here are the important steps in this process, which took us about a month of working on weekends (longer than we expected, but still enjoyable):
- Framed the floor with pressure-treated 2x4s. Even though this is protected from rain by the patio roof, we wanted to be sure the floor joists won’t start rotting if any moisture gathers under there. Because the patio is slightly sloped away from the house (as all good patios are), we had to elevate it slightly on the downhill side to make the floor level. We only used 2x4s, because it’s such a small space, but we did put some small blocks of pressure treated wood under the elevated area to keep the boards from bowing when you walk across the floor.
- We bought real subfloor OSB plywood for the floor. It’s a bit expensive and heavy, but we wanted to be sure the floor felt solid.
- Framed and cut the floor around two of the patio-roof posts, which became part of the wall.
- Framed two walls like a normal build, with 2×4 studs on 16″ centers, doubled the 2x4s as headers and sills over and under windows. Getting the triangular slope of the one side wall under the roof was a little challenging, but we figured it out. The other two walls are just the stucco exterior of the house. We think it has some charm like that.
- Bought antique windows from local folks online or at the Habitat for Humanity ReStore. That was fun but sometimes frustrating. Two of the windows are attached at the top with a long strap hing (also called a box hinge), so they can be operated like awning windows, with the bottom pushing outward. It’s the cold season now, but when it warms up, we’ll figure out some kind of dowel kick-stand thing to prop them open. They latch closed with twine around the cute little flower drawer handles in the second-to-last pic above. It works.
- Bought an old french door — just the one half as the door — we wanted it to have a lot of glass. We put new hinges on it and had to create the whole door jamb from scratch, but that just takes a bit of patience and shimming. Not hard skills, but a bit of trial and error to align the door just right.
- Then, we got our our trusty nail gun and attached all the beautiful homemade shiplap we created. See the last photo above for the detail on the shiplap edges.
- We found someone online who sells small batches of engineered hardwood flooring — he has leftovers from flooring jobs and sells them for a good price. We bought just enough for our 70 square feet and installed that. One lesson learned — we didn’t put enough glue down around one edge, and the boards were flexing and lifting a little until we put some molding down to hold it tight. Next time, we’ll use a lot more glue.
- We cut a hole in the siding just big enough for a heavy-duty extension cord to go through for the heater, some lights, and phone-charging.
- Then, a little decorating! And it fits a queen bed!
A few more things to do
We still have a few things left to do — we will paint the studs white or maybe use a whitewash. We also need to put some molding around the interior of the door jamb. When the weather warms, we’ll cut and frame out a hole in the wall for a small air conditioner. The space is really just for sleeping, but when it hits 110 degrees in Sacramento, you need AC at night to sleep.
There you have it! Now we have the extra room we need to host our kids and their partners when they come to visit. Oh, and this is a serious upgrade from the previous solution — a tent under the patio roof with a queen bed inside! :)


